
Map All Fields With One Mouse Click or One Function Key

Did you know that redesigning an existing form in JMagic is as easy as clicking one button, and all the spooled file fields are retrieved and displayed just like they appear on the form? Or, did you know that selecting a data source is just as easy in the native System i interfaces? By pressing one function key, every field in a database file can be imported into a label format.
How To use JMagic Map All Feature
Defining SM@RT Forms is easier than ever. You can automatically create an entire format against an existing spooled file. JMagic will create a new text field every time there are one or more blank spaces between the text in your spooled data file. This is a fast way to duplicate your spooled data. You can add lines, boxes, bar codes, and graphics without mapping each text field individually. Font changes can be made quickly, fields can be deleted to customize your form, and you can put it into production in minutes.
- Start JMagic and select a User Library.
- Create a new format or open an existing format.
- Create a new variable Text field, for example, using Font 27, (Courier), 11 pt.
- Click the Browse button next to the field name and choose the Spooled file tab.
- Browse and select the spooled output file to map. Click OK.
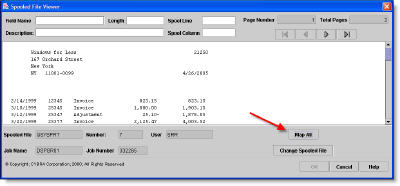
A window will appear displaying your spooled output file, click the Map All button to initiate the mapping process. JMagic will create a separate text field in your format for each field in your spooled output file.
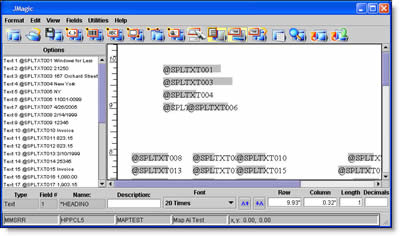
Once the mapping is complete, add lines, boxes, graphics, and bar codes to the format. You can also modify the mapped text fields' sizes or font types.
How To use MarkMagic Select All Feature
One of the strengths of the IBM iSeries is its integrated relational database, DB2/400, part of the OS/400 operating system. Any OS/400 database field on an iSeries system can be defined in a MarkMagic format, and printed with MarkMagic, regardless of what program created the database records.
Using the standard F4 (Prompt) key to select a database field definition is the easiest and fastest way to define variable fields. No need to search through data base printouts or documentation to find the fields you need. Any database field on an iSeries system can be defined in a MarkMagic format, and printed with MarkMagic 5, regardless of what application created the database records. But what if a file contains 600 database fields? Simply press F21!
- Start MarkMagic and select a User Library.
- Create a New Format or Open an existing format.
- Press F6 and select D to create a Data Field.
- On the field name parameter of a Work with Data field screen, press F4 to display the List Field Options dialogue window.
- Enter 1 to select database fields. For the database file parameter, type the name of the file that contains the field you want to appear on your label, or press F4 to select a database file. You may also need to supply the name of the library your files are in. Press ENTER, and the Select a Database Field window is displayed.
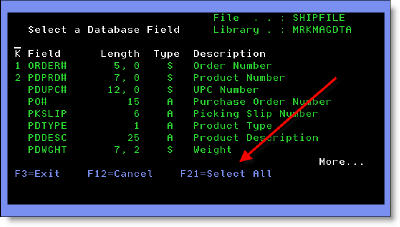
Press F21 (Select All).
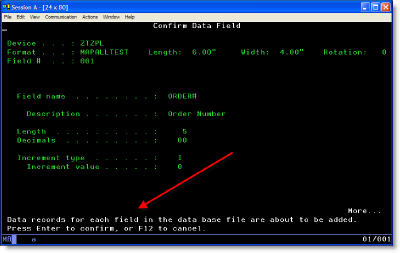
Press ENTER to add Data field records for each field in the database file.
When you select all database fields in a file, MarkMagic creates the parameters for Data field name, description, length, and decimals automatically. You should not change these values so that the label file's fields will be consistent with those in your application files. This information, in each field definition, has to match the field definitions in the database file when you use MarkMagic to automatically retrieve application data into the label file.