Creating a Printer Job Using JMagic
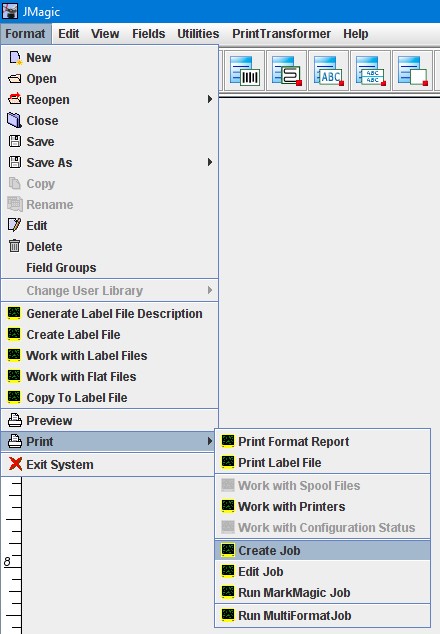
This section will provide a quick overview of creating a Printer Job using CYBRA's JMagic GUI designer tool. For more in-depth help specific to JMagic, please see the Help menu within the JMagic tool itself. The instructions here assume you are able to sign in to JMagic and have started in the correct user library where your format design is. To create a Printer Job, start by going to Format >> Print >> Create Job.
You will be presented with the Create Job dialog window as seen below.
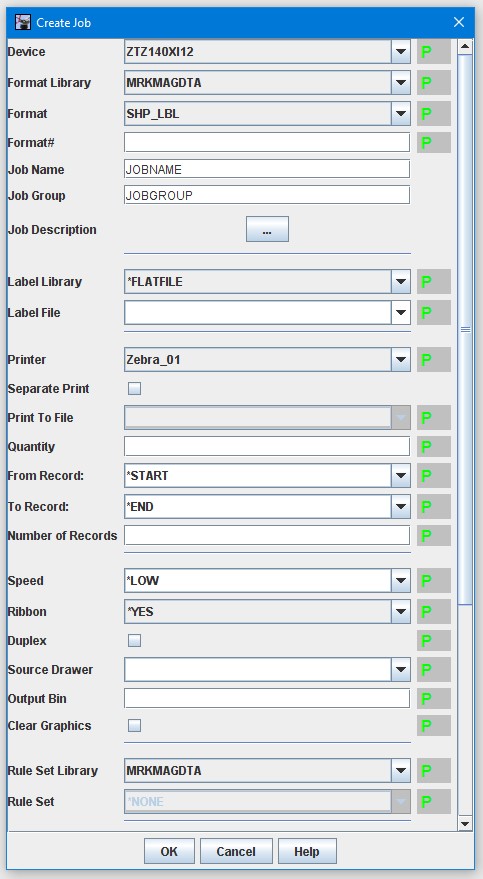
Required parameters for creating a Printer Job that will be used strictly with the MMPI Print Monitor:
- Device - The device type (or printer type) of the MMPI format that will be used when the Printer Job is ran.
- Format Library - The library where the MMPI format is located. Ideally all objects involved in the process (Format, Graphics, Job, RuleSet, etc) should always all be in the same user library.
- Format - The MMPI format name.
- Job Name - Provide a name for the Printer Job. Maximum 10 characters.
- Job Group - Provide a group name for the Printer job. Maximum 10 characters. This group name is simply for organizational purposes. The idea is that you would create similar Printer Jobs all grouped together under the same group name. For example, jobs that are all used for different forms printing (invoices, packing lists, statements, etc.) could be created under the group name FORMS.
- Label Library - Normally reserved for specifying the user library where a database file would reside, this setting can also be used to tell MMPI that the data is coming from a flat file. For a Printer Job that will be used with a Print Monitor, always set this to *FLATFILE as seen in the above screenshot.
- Label File - This setting is normally reserved for specifying the name of the database file or the name of the flat file. For a Printer Job that will be used with a Print Monitor, set this value to blanks. This is because the MMPI Print Monitor will pass the exact path and name of the flat file that triggered the job to this parameter. There is no need to specify any path or flat file name yourself.
- Printer - The destination printer name. When this Printer Job runs, it will direct all printer output to this printer. The list you will see in the pull down menu will show all printers that have already been added in the Maintain Printers page of the main MMPI web interface.
The rest of the parameters on this window could be considered optional when creating a Printer Job for use with the MMPI Print Monitor. Two notable optional parameters when creating a job are Rule Set Library and Rule Set. If you own the PrintTransformer add-on option, you could create a MMPI RuleSet that would add more "smarts" to the Printer Job. Rather than relying on hard-coded values in the Printer Job, the RuleSet could run tests and override values such as the Printer, it could send an email instead of print, or break up the input data into separate jobs and then redirect those jobs to different printers, etc.
For more information on PrintTransforer, please Click Here.