Review Marked Objects
The Review Marked Objects screen is the final step in the Import Objects process. This screen provides an overview of all selected MMPI objects from the previous screens.
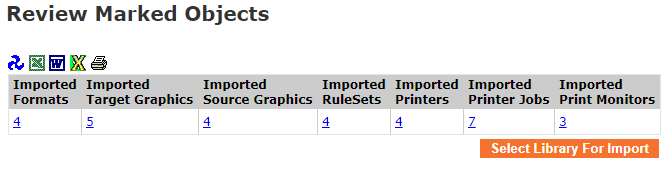
If you wish to review previously selected objects again before importing, click the number underneath that object type. You will see a list of objects that have been selected for import.
Example showing screen for Reviewing Marked Target Graphics to Import:
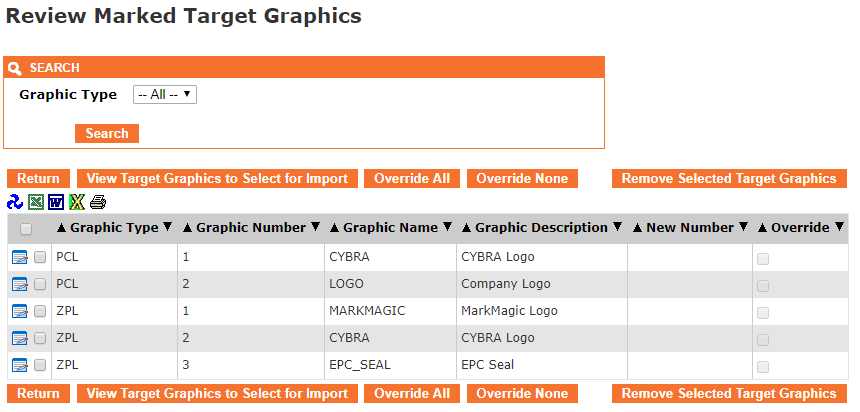
To remove an object from being imported, click the check box next to the object and then click the respective Remove Selected Object button. Once satisfied with the changes, click the Return button.
To import all objects that have been selected, press the Select Library For Import button. You will be shown a list of MarkMagic user libraries in your MMPI environment.
Example list of MarkMagic user libraries:
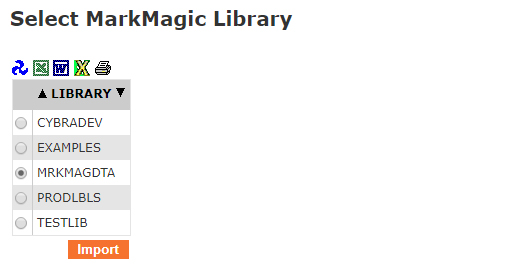
Choose the library to import into. If you do not have any custom user libraries, then you will only see the default MRKMAGDTA library. Once you select the desired library, press the Import button.
At this point, MMPI will import all selected objects into the selected user library. If there are any conflicts at all, the import process will pause and you will be presented with a new screen to resolve the conflict. These include formats with the same name, graphics with the same number, RuleSets with the same name, etc. All conflicts must resolved before the import process can complete.
Ways to resolve a conflict:
- Remove the object from the import - Select the object in the table by using the check box to the left and then press the Remove Selected Object from Import button. This will remove that object from being imported.
- Set the object to Override - Select the Edit Record
 button next to the object and then choose the check box for Override. Click the Update button. The object will now overwrite any existing object in the user library.
 - Rename / renumber the object - Select the Edit Record button next to the object and then (depending on the object type) either rename or renumber the object. Click the Update button. The object will now be imported into the user library using the new name / number while preserving the existing object.
Once all conflicts are resolved, press the Import button again to finish the import process.
