Convert
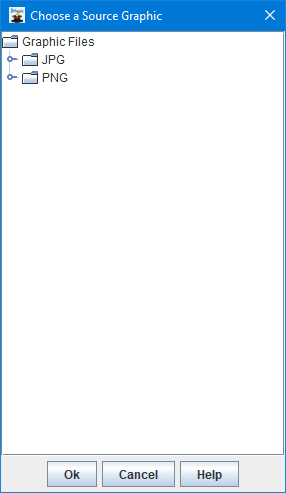
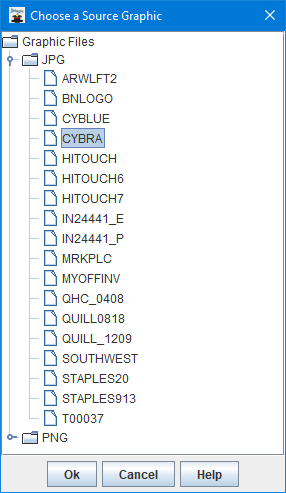
The Convert option under the Graphics menu will open a dialog displaying available source graphics sorted by graphic type. If this window is blank that means no source graphics have been uploaded yet. Please see Load for more information on uploading a source graphic. To convert a new Target graphic, first click the graphic type to expand the list, then choose a source graphic and finally click Ok.
The CYBRA Image Converter will now be displayed. This dialog also displays automatically upon completion of the source image upload process when using the Load option.
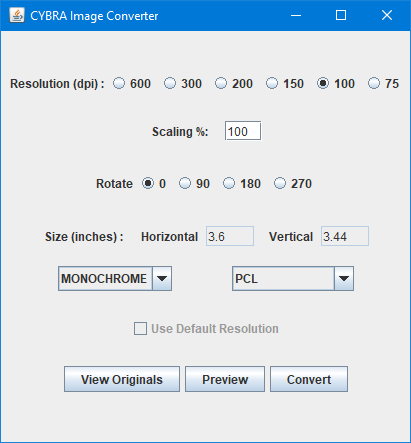
Selecting the correct options on this dialog is critical in creating a Target image that will print correctly on your MarkMagic format. The first important choice here is setting the Resolution correctly. This value must match the resolution of the MarkMagtic print driver (printer type) that your format is designed under.
For example, when creating a Target graphic for printing on a label designed under the ZTZ140XI12 MarkMagic driver, choose 200. This is because the ZTZ140XI12 driver is set to 200dpi resolution. When creating a Target graphic for printing on a form designed under the HPPCL5 MarkMagic laser printer driver, choose 300. This is because all laser printer drivers in MarkMagic use 300dpi resolution.
Once the correct resolution is set, the values depicted in the Size (inches) section will be accurate. These values will tell you exactly how wide and tall the image will print on a printer with the corresponding resolution. To change the scale the resulting Target image, you can adjust the Scaling % value. Note how the Size(inches) values update in real time as the Scaling % value is adjusted.
Another important value to consider before converting is the rotation. This value must match the rotation of the format that you plan to place the image onto. The rotation setting of your format can be found by selecting Edit from the Format menu while your format is open.
The pull down menu on the left is the conversion "quality". MONOCHROME assumes the source image provided is a pure black and white graphic. If your source image contains multiple colors, gradients, shading, etc, choose somethign other than MONOCHROME. PHOTO++ is the highest quality conversion.
Lastly, choose the correct Target graphic type. Each driver family in MarkMagic uses a specific graphic type.
- PCL - Black and white laser printers (HPPCL5, HPLJ4P, etc.)
- PCLC - Color laser printers (HPPCL5C)
- MM9945 - Legacy Monarch MPCL printers
- MMMPCL - Current Monarch MPCL printers (MM9830, MM9855, etc.)
- ZPL - Zebra printers (ZTZ140XI12, ZTS300, etc.)
- PCX - Printronix and Datamax printers (PXPGL, DMXI4208, etc.)
- TEC2 - Toshiba TEC printers (TEBSX5, TE472, etc.)
- AFP - IBM IPDS / AFP (AFPDSFX)
- EPT - Avery Dennison printers (AD6405, ADTTK8, etc.)
- IMC - Intermec printers (IM4400, IMPM4I, etc.)
- EPNG - Epson ColorWorks printers (EPC7500G)
Once satisfied with the conversion values, click Convert.
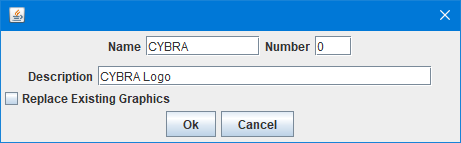
Provide a name for the Target image. This can be a maximum of 10 characters and does not have to be unique within the graphics gallery. Leaving the number set to 0 will force JMagic to assign the next available number in the graphics gallery. This number can be manually set and does need to be unique within the gallery. Finally, set the Target graphic description. This can be a maximum of 30 characters and does not have to be unique within the graphics gallery.
Choose Replace Existing Graphics to overwrite any existing images if forcing a custom Target graphic number. Click Ok to perform the conversion.
The Target image conversion is complete. It can now be added to any format via the Create a Graphic Field dialog.