SQL Fields

Use the SQL Fields menu option to create and manage any SQL statements that are on your format. The SQL Fields option will be grayed out if there is no format open in JMagic.
In MarkMagic version 10 and up, you can create custom SQL SELECT statements that can be used to retrieve extra data from outside sources such as an Oracle database or MySQL database. Note that the database connections must first be established in the MarkMagic main program on your server side. Please see the relevant help documentation for your appropriate MarkMagic environment for more information on creating the initial SQL connections.
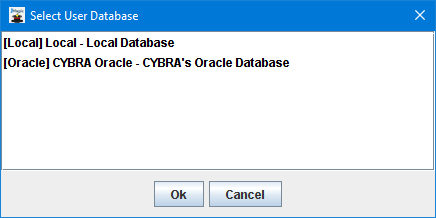
SQL statements are part of the MarkMagic format and each format can have its own set of custom SQL statements. Use the Add button to create a new SQL statement on your format. You will be presented with a list of available database connections.
After choosing a database and clicking Ok, the Add SQL Statement screen appears.
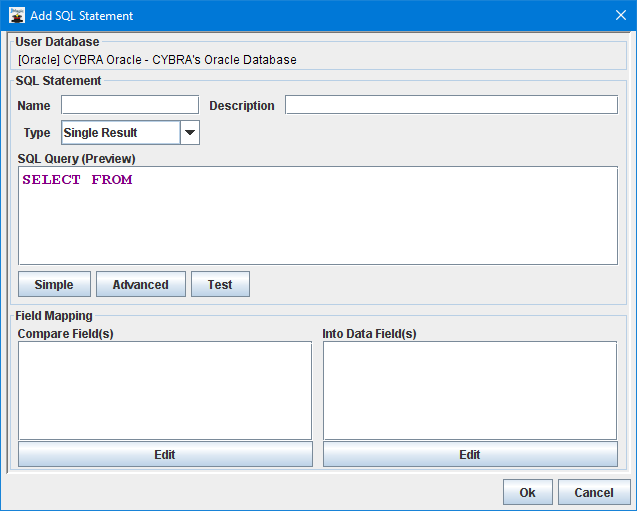
- Name - The name of the SQL Statement
- Description - The description of the SQL Statement
- Type - Sets whether the statement should be a single lookup or a repeat lookup. A single result lookup will retrieve information from the the first result of the SQL query and stop there. A repeating lookup will retrieve information from all rows of data from that satisfy the query.
- SQL Query (Preview) - A preview of the SQL SELECT statement that MarkMagic will execute. This view will be updated in real time as you the modify the statement using the Simple or Advanced methods and select different compare / into fields.
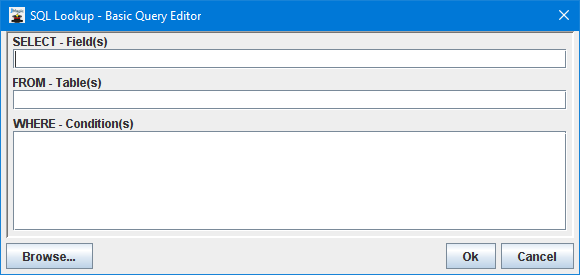
Use the Simple button to launch the Basic Query Editor screen.
Use the Browse... button to launch the Database Explorer screen.

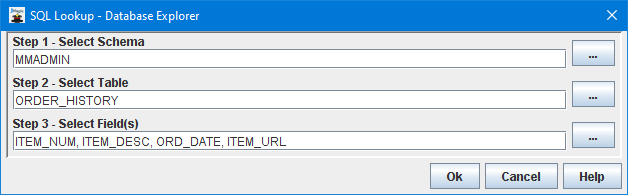
Start from the top using the "..." buttons on the side to first choose the Schema, Table, and then any fields that will be involved in the SELECT statement. After browsing and choosing fields, all information will be placed into the correct elements. Click Ok to continue.
Example Database Explorer screen with information filled in after browsing:
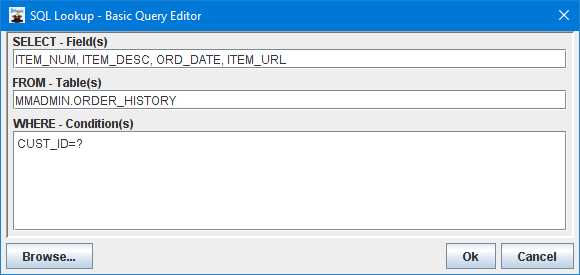
Click Ok to return to the Basic Query Editor. The final piece information required for a successful SELECT statement is the WHERE clause and will be blank upon returning from the Database Explorer screen. This is the only element that must manually be typed in. Specify the field name(s) from the database along with =?. Example below:
Click Ok to return to the Edit SQL Statement screen.
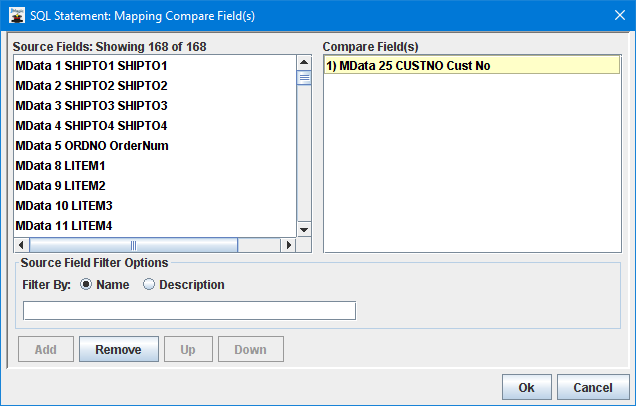
All that is left is to specify the Compare fields and the Into fields. Compare fields will replace any question marks in order within the WHERE clause of the statement. Into fields will be assigned in order to every database field in the SELECT portion of the statement.
Choose compare fields using the Edit button under the Compare Field(s) section.
Choose Into fields using the Edit button under the Compare Field(s) section. Each database field defined in the SELECT portion will be assigned in order to each Into MarkMagic field chosen here.

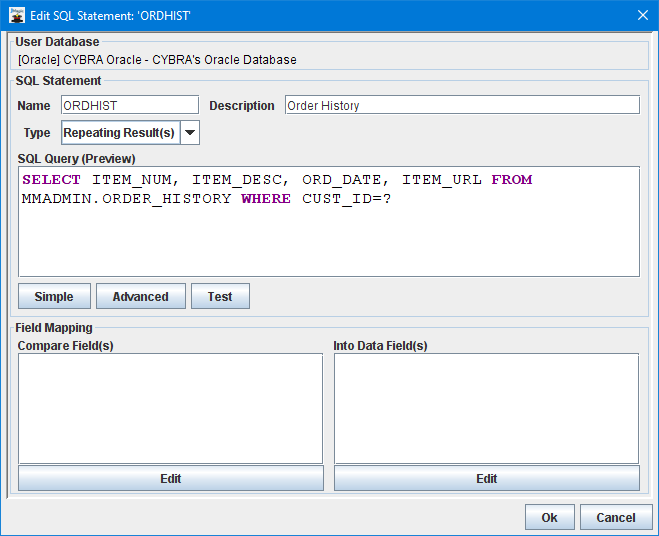
Example completed SQL statement selecting four database fields from ORDER_HISTORY database, inserting those data elements into four MarkMagic Data fields while using the already available customer number CUSTNO from the Markmagic format:

Any SQL statements that are part of the format are always executed in order they are created and are always automatically performed when ever the MarkMagic format is printed.