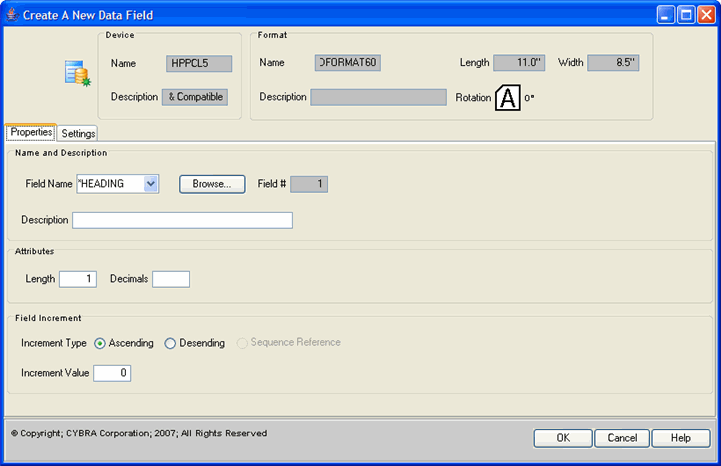
Click the New Data Field Button to create a Data field. This opens the Create a New Data Field Window.
Click the Browse Button to attach a data field. This opens the Field Browse Window.
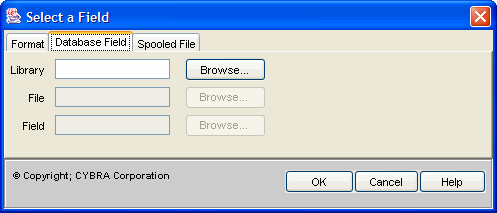
Type MRKMAGDTA for the Library, and click the Browse Button to retrieve the list of files in the library MRKMAGDTA.
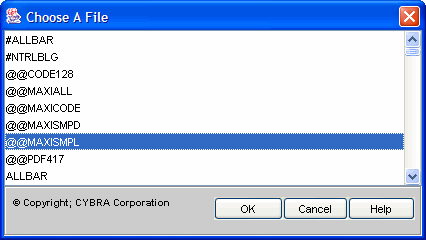
From the list of OS/400 database files in MRKMAGDTA, select the MarkMagic SM@RT File @@MAXISMPL (MarkMagic supplied SM@RT Files begin with "@@"). Click the OK Button to retrieve the list of fields.
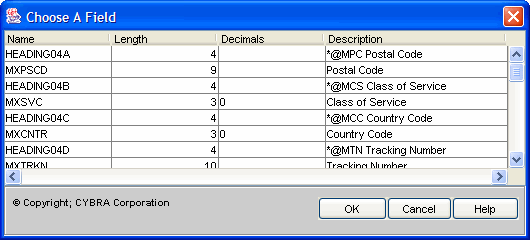
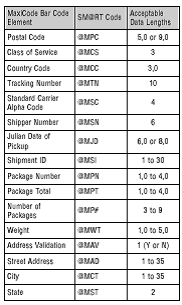
To select all the field names, click on the first name and scroll to the bottom of the list. Holding down the Shift Key, click on the last name in the list. Click the Ok Button to create MaxiCode fields — Headings and variable pairs. The Data *HEADING fields are the MaxiCode SM@RT codes, and the variable fields contain application data. You may change the variable field names to match those in your database files. The MaxiCode SM@RT Code table shows acceptable variable field lengths.
Click the BarCode Field Button to create a new barcode field. Move your cursor to the top of the field and press ENTER. Do not worry about drawing the field height precisely — UPS MaxiCode is always printed 1" by 1".
Type *LINK for Field name, select MaxiCode (UPS) for Bar Code Type, and click on the Link Fields Tab.
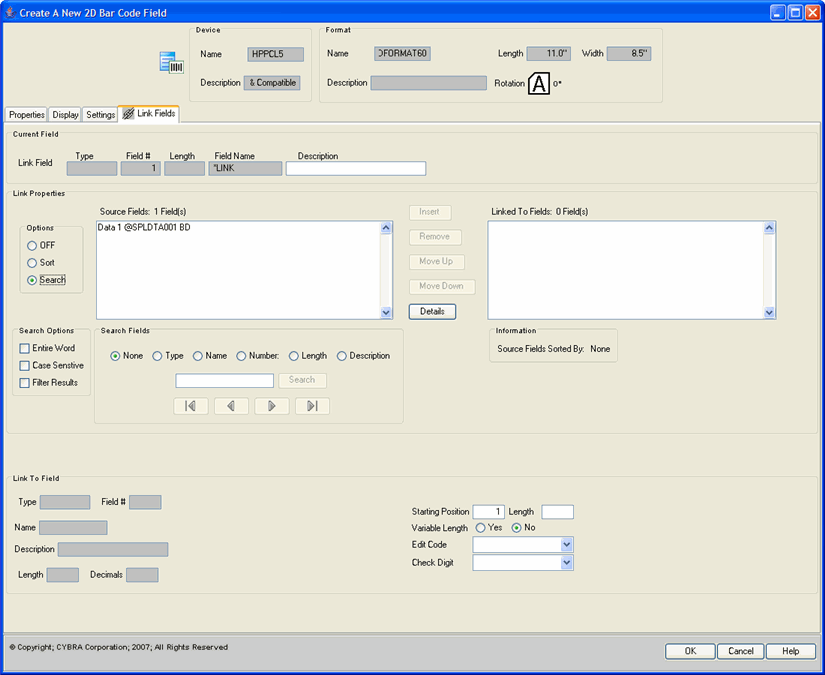
Scroll through the Source Fields List until you find the Data Field that you just created. Select it from the list and click the Insert Button. This will add it to the Linked Fields List and provide you additional opportunity to specify field information

When you have finished, click the OK Button.
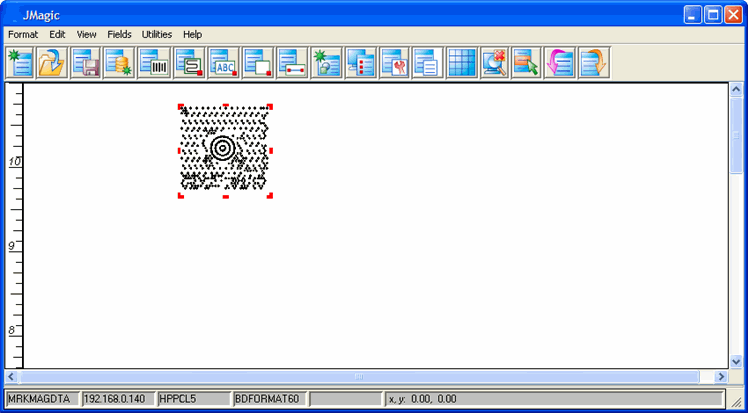
10. The new barcode will be added to the design canvas.
Note: Your data must contain a valid value for Postal Code and Country Code. If not, the data will not be formatted as a Postal MaxiCode —the actual SM@RT Codes will appear in the bar code field output and will not be processed.